How to Call API’s With Kotlin Coroutines In Right Way
Introduction
API calls are a crucial part of any Android application development, and understanding how they work is essential. API, which stands for Application Programming Interface, connects application services to users, improving their experience. The API is responsible for handling significant changes, making it easy to modify the product. There are various ways to call an API and transfer data between applications in Android development. Asynchronous API calling is the most efficient method, and there are several ways to perform parallel work, including AsyncTask, RxJava, and Coroutine. Coroutine is the best option for efficient parallel work because it is highly recommended by the Kotlin language and Android development community. In this blog, we will discuss how to use Call API’s with Kotlin Coroutines.
Before moving forward, if you are seeking to grasp the fundamentals of Coroutine, then you must check out this blog first:
Let’s start learning API calling with the help of Kotlin Coroutine
We are creating one demo application for the purpose of calling the imdb API to retrieve the movie data. The API information is provided in the following:

API Link (Sign-UP)
https://imdb-API.com/
API (Use purpose)
https://imdb-API.com/API/SearchMovie/{API_key}/{expression}
When you sign up in this given API, then the API site will give you an API key, it is necessary to call the API.
Good to have knowledge for this demo :
- Normal API calling and it’s fundamentals
- Android development fundamentals
- Dependency Injection normal information
Reference : Dagger Hilt in Android Step by Step Guidance
This much knowledge is enough.
Let’s start by creating a project, first take all dependencies which are important for our project.
//gradle(app level)
plugins {
   id 'com.android.application'
   id 'org.jetbrains.Kotlin.android'
   id 'Kotlin-kapt'
   id 'dagger.hilt.android.plugin'
}

android {
   namespace 'com.example.asyncAPIcalling'
   compileSdk 32

   defaultConfig {
       applicationId "com.example.asyncAPIcalling"
       minSdk 22
       targetSdk 32
       versionCode 1
       versionName "1.0"

       testInstrumentationRunner "androidx.test.runner.AndroidJUnitRunner"
   }

   buildFeatures {
       dataBinding true
   }

   buildTypes {
       release {
           minifyEnabled false
           proguardFiles getDefaultProguardFile('proguard-android-optimize.txt'), 'proguard-rules.pro'
       }
   }
   compileOptions {
       sourceCompatibility JavaVersion.VERSION_1_8
       targetCompatibility JavaVersion.VERSION_1_8
   }
   KotlinOptions {
       jvmTarget = '1.8'
   }
}

dependencies {

   implementation 'androidx.core:core-ktx:1.7.0'
   implementation 'androidx.appcompat:appcompat:1.5.1'
   implementation 'com.google.android.material:material:1.7.0'
   implementation 'androidx.constraintlayout:constraintlayout:2.1.4'
   implementation 'com.google.android.gms:play-services-dtdi:16.0.0-beta01'
   testImplementation 'junit:junit:4.13.2'
   androidTestImplementation 'androidx.test.ext:junit:1.1.4'
   androidTestImplementation 'androidx.test.espresso:espresso-core:3.5.0'


   //retrofit
   implementation "com.squareup.retrofit2:retrofit:2.9.0"
   implementation "com.squareup.okhttp3:okhttp:4.7.2"
   implementation "com.squareup.okhttp3:logging-interceptor:4.7.2"
   implementation "com.squareup.retrofit2:converter-gson:2.9.0"

   //Coroutine
   implementation 'org.jetbrains.Kotlinx:Kotlinx-Coroutines-core:1.4.2'
   implementation 'org.jetbrains.Kotlinx:Kotlinx-Coroutines-android:1.4.1'

   //Coroutine Lifecycle Scope
   implementation "org.jetbrains.Kotlinx:Kotlinx-Coroutines-android:1.4.1"
   implementation "org.jetbrains.Kotlinx:Kotlinx-Coroutines-core:1.4.2"
   implementation "androidx.lifecycle:lifecycle-viewmodel-ktx:2.5.1"

   //sdp-ssp
   implementation 'com.intuit.sdp:sdp-android:1.1.0'
   implementation 'com.intuit.ssp:ssp-android:1.1.0'

   //dagger-hilt
   implementation "com.google.dagger:hilt-android:2.44"
   kapt "com.google.dagger:hilt-compiler:2.44"

   //ok-http
   implementation "com.squareup.okhttp3:okhttp-bom:4.10.0"

   //glide
   implementation 'com.github.bumptech.glide:glide:4.14.2'

}

//allow references to generated code
kapt{
   correctErrorTypes = true
}
//gradle (project level)
// Top-level build file where you can add configuration options common to all sub-projects/modules.
plugins {
   id 'com.android.application' version '7.3.1' apply false
   id 'com.android.library' version '7.3.1' apply false
   id 'org.jetbrains.Kotlin.android' version '1.7.20' apply false
   id 'com.google.dagger.hilt.android' version '2.44' apply false
}
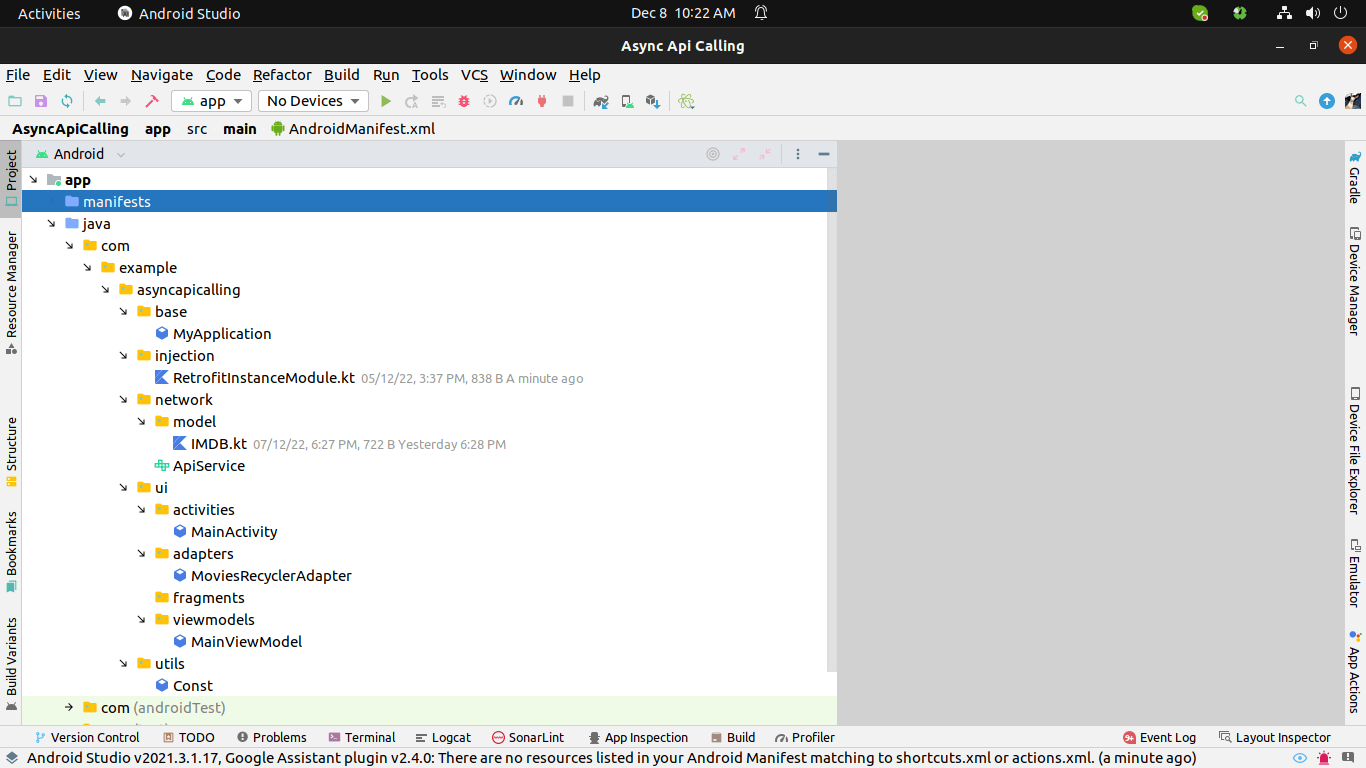
After applying all dependencies in the both gradle, take a minute and see the code structure of our project.
Create one activity_main.xml file for design purpose :
Layout file for main activity :
activity_main.xml
<?xml version="1.0" encoding="utf-8"?>
<layout xmlns:android="http://schemas.android.com/apk/res/android"
   xmlns:app="http://schemas.android.com/apk/res-auto"
   xmlns:tools="http://schemas.android.com/tools">

   <data>
       <variable
           name="mainviewmodel"
           type="com.example.asyncAPIcalling.ui.viewmodels.MainViewModel" />
   </data>

   <androidx.constraintlayout.widget.ConstraintLayout
       android:layout_width="match_parent"
       android:layout_height="match_parent"
       tools:context=".ui.activities.MainActivity">

       <TextView
           android:id="@+id/validation_text_for_search"
           android:layout_width="wrap_content"
           android:layout_height="wrap_content"
           app:layout_constraintTop_toTopOf="parent"
           app:layout_constraintEnd_toEndOf="parent"
           app:layout_constraintStart_toStartOf="parent"
           app:layout_constraintBottom_toBottomOf="parent"
           android:text="@string/search_something_text"
           android:textSize="@dimen/_12sdp"
           android:textColor="@android:color/holo_green_dark"
           />

       <androidx.appcompat.widget.Toolbar
           android:id="@+id/title_toolbar"
           android:layout_width="match_parent"
           android:layout_height="60dp"
           android:background="#3EB489"
           android:textAlignment="center"
           app:layout_constraintTop_toTopOf="parent"
           app:navigationIcon="@drawable/ic_movie"
           app:subtitle="cartoon category"
           app:subtitleTextColor="@color/white"
           app:title="Movies"
           app:titleTextColor="@color/white">

       </androidx.appcompat.widget.Toolbar>

       <EditText
           android:id="@+id/the_search_bar"
           android:layout_width="0dp"
           android:layout_height="wrap_content"
           android:background="@drawable/curved_background"
           android:padding="@dimen/_5sdp"
           android:text="@={mainviewmodel.expressionToSearch}"
           android:layout_marginTop="@dimen/_5sdp"
           android:layout_marginStart="@dimen/_5sdp"
           app:layout_constraintStart_toStartOf="parent"
           app:layout_constraintEnd_toStartOf="@+id/the_search_button"
           app:layout_constraintTop_toBottomOf="@id/title_toolbar"
           />

       <androidx.constraintlayout.utils.widget.ImageFilterView
           android:id="@+id/the_search_button"
           android:layout_width="@dimen/_30sdp"
           android:layout_height="@dimen/_30sdp"
           android:src="@drawable/ic_search"
           app:layout_constraintTop_toTopOf="@id/the_search_bar"
           app:layout_constraintEnd_toEndOf="parent"
           android:layout_marginEnd="@dimen/_5sdp"
           android:padding="@dimen/_5sdp"
           android:paddingEnd="@dimen/_10sdp"
           android:background="@drawable/curved_background_right"
           />

       <ProgressBar
           android:id="@+id/main_progress_bar"
           android:layout_width="wrap_content"
           android:layout_height="wrap_content"
           android:visibility="gone"
           app:layout_constraintBottom_toBottomOf="parent"
           app:layout_constraintEnd_toEndOf="parent"
           app:layout_constraintStart_toStartOf="parent"
           app:layout_constraintTop_toTopOf="parent"
           tools:visibility="visible" />

       <androidx.recyclerview.widget.RecyclerView
           android:id="@+id/movie_recycler_view"
           android:layout_width="match_parent"
           android:layout_height="0dp"
           android:layout_marginTop="@dimen/_5sdp"
tools:listitem="@layout/raw_movies_item_layout"
           app:layout_constraintBottom_toBottomOf="parent"
           app:layout_constraintTop_toBottomOf="@id/the_search_bar" />

   </androidx.constraintlayout.widget.ConstraintLayout>
</layout>
Then after we will complete the raw item file for our recyclerview, It will show us how our single item will look like this.
Layout File for items
raw_movies_item_layout.xml
<?xml version="1.0" encoding="utf-8"?>
<layout xmlns:android="http://schemas.android.com/apk/res/android"
   xmlns:tools="http://schemas.android.com/tools"
   xmlns:app="http://schemas.android.com/apk/res-auto">

   <data>

   </data>

   <RelativeLayout
       android:layout_width="match_parent"
       android:layout_height="wrap_content">

       <androidx.constraintlayout.widget.ConstraintLayout
           android:layout_width="match_parent"
           android:layout_height="match_parent">

           <ImageView
               android:id="@+id/image_of_movies"
               android:layout_width="match_parent"
               android:layout_height="@dimen/_125sdp"
               tools:src="@mipmap/ic_launcher"
               android:scaleType="centerCrop"
               app:layout_constraintTop_toTopOf="parent" />

           <TextView
               android:id="@+id/title_of_movie"
               android:layout_width="wrap_content"
               android:layout_height="wrap_content"
               tools:text="Inception"
               android:textSize="@dimen/_18ssp"
               android:textStyle="bold"
               android:textColor="@color/black"
               app:layout_constraintTop_toBottomOf="@id/image_of_movies"
               app:layout_constraintStart_toStartOf="parent" />

           <TextView
               android:id="@+id/description_of_movie"
               android:layout_width="wrap_content"
               android:layout_height="wrap_content"
               tools:text="this is the best movie ever i watched"
               android:textSize="@dimen/_15ssp"
               app:layout_constraintStart_toStartOf="parent"
               app:layout_constraintTop_toBottomOf="@+id/title_of_movie" />


       </androidx.constraintlayout.widget.ConstraintLayout>

   </RelativeLayout>
</layout>


Completing this, Then after see our manifest file:

<?xml version="1.0" encoding="utf-8"?>
<manifest xmlns:android="http://schemas.android.com/apk/res/android"
   xmlns:tools="http://schemas.android.com/tools">

   <uses-permission android:name="android.permission.INTERNET"/>

   <application
       android:name=".base.MyApplication"
       android:allowBackup="true"
       android:dataExtractionRules="@xml/data_extraction_rules"
       android:fullBackupContent="@xml/backup_rules"
       android:icon="@mipmap/ic_launcher"
       android:label="@string/app_name"
       android:roundIcon="@mipmap/ic_launcher_round"
       android:supportsRtl="true"
       android:theme="@style/Theme.AsyncAPICalling"
       android:usesCleartextTraffic="true"
       tools:targetAPI="31">
       <activity
           android:name=".ui.activities.MainActivity"
           android:exported="true">
           <intent-filter>
               <action android:name="android.intent.action.MAIN" />

               <category android:name="android.intent.category.LAUNCHER" />
           </intent-filter>

           <meta-data
               android:name="android.app.lib_name"
               android:value="" />
       </activity>
   </application>

</manifest>
After finishing the manifest and its permissions, We will start the coding for dagger-hilt.
For Dagger-hilt first we have to declare one application class and then this class should be put in the manifest file like above. Put the application class package name in the “name” parameter of application tag as shown in the above code.
Application class
MyApplication.kt
package com.example.asyncAPIcalling.base

import android.app.Application
import dagger.hilt.android.HiltAndroidApp

@HiltAndroidApp
class MyApplication : Application() {

}
By using that annotation @HiltAndroidApp we can notify the hilt that this is the application class for our dependency injection operations. And This class will be put in the base package only.
Then after coming in the injection package, here you have to put the module class which can create the function that helps to put the instance of needed variable and data.
So create one class of module which declares the function of the retrofit instance.
Module class
RetrofitInstanceModuel.kt
package com.example.asyncAPIcalling.injection

import com.example.asyncAPIcalling.network.APIService
import dagger.Module
import dagger.Provides
import dagger.hilt.InstallIn
import dagger.hilt.components.SingletonComponent
import retrofit2.Retrofit
import retrofit2.converter.gson.GsonConverterFactory
import retrofit2.create
import javax.inject.Singleton

const val BASE_URL = "https://imdb-API.com/"

@Module
@InstallIn(SingletonComponent::class)
class RetrofitInstanceModule {

   @Provides
   @Singleton
   fun theRetrofitInstance() : APIService {
       val API : APIService by lazy {
           Retrofit.Builder()
               .baseUrl(BASE_URL)
               .addConverterFactory(GsonConverterFactory.create())
               .build()
               .create(APIService::class.java)
       }
       return API
   }

}
You can see here that there are some annotations which are used to perform dependency injection.
@Module
@InstallIn
@Proivdes
@Singleton
@Module annotation will be used to notify the dagger-hilt that this is the module class of our project which can use the function declaration of needed instance class.
And @Proivdes annotation will be used to notify that this function will be put where you want by @Inject.
In this theRetrofitInstance() function, we build the retrofit instance for generating API calling. We have to pass the base url of the API.
For Creating the retrofit instance you first create one interface class of the API calling function.
API service class
APIService.kt
package com.example.asyncAPIcalling.network

import com.example.asyncAPIcalling.network.model.IMDB
import retrofit2.Response
import retrofit2.http.GET
import retrofit2.http.Path

interface APIService {
@GET("/API/SearchMovie/{API_key}/{expression}")
  suspend fun imdbFunction(
       @Path("API_key") APIKey : String,
       @Path("expression") searchExpression : String,
   ) : Response<IMDB>

}
So, We will create one interface class which will be used for declaration of all API calling functions.
You can see above code there is one imdbFunction() function which is a suspend function, whenever you have to use Coroutine function then you must have to declare it as suspend function.
In the above function @GET annotation is used for retrieving the data from API, this annotation changes according to its operation type.
Like : @PATCH, @GET, @POST etc…
And after that the return type of function is IMDB class.
The Model class
IMDB.kt
package com.example.asyncAPIcalling.network.model

import com.google.gson.annotations.SerializedName


data class IMDB(
   @SerializedName("searchType") var searchType: String? = null,
   @SerializedName("expression") var expression: String? = null,
   @SerializedName("results") var results: ArrayList<Results> = arrayListOf(),
   @SerializedName("errorMessage") var errorMessage: String? = null,
)

data class Results(
   @SerializedName("id") var id: String? = null,
   @SerializedName("resultType") var resultType: String? = null,
   @SerializedName("image") var image: String? = null,
   @SerializedName("title") var title: String? = null,
   @SerializedName("description") var description: String? = null,
)
We use the Data class for containing the data which is provided by the server. So we can easily fetch data and communicate with them.
You see there is one annotation like @SerializedName, This is a normal annotation but creates a great impact to our operation of doing API calling. It will hand-me-down the serialize field with another name rather than its actual name. If API give me the “real_name” field but i have to use “unreal_name” so i will put down the “real_name” in @SearializedName(“real_name”) and then declare that “unreal_name”, then i will able to use that “unreal_name” all over the project and it will work like “real_name”.
After creating all functions, let’s go to the adapters package and quickly create the adapter class for our recycler view. In our adapter class of recyclerview we will use the DiffUtil method to create efficient work from recyclerview. It is the more optimized and structured way to create one adapter class.
Adapter class
MoviesRecyclerAdapter.kt
package com.example.asyncAPIcalling.ui.adapters

import android.view.LayoutInflater
import android.view.ViewGroup
import androidx.recyclerview.widget.AsyncListDiffer
import androidx.recyclerview.widget.DiffUtil
import androidx.recyclerview.widget.RecyclerView
import com.bumptech.glide.Glide
import com.example.asyncAPIcalling.R
import com.example.asyncAPIcalling.databinding.RawMoviesItemLayoutBinding
import com.example.asyncAPIcalling.network.model.Results

class MoviesRecyclerAdapter : RecyclerView.Adapter<MoviesRecyclerAdapter.MoviesViewHolder>() {

   inner class MoviesViewHolder(private val rawMoviesItemLayoutBinding: RawMoviesItemLayoutBinding) :
       RecyclerView.ViewHolder(rawMoviesItemLayoutBinding.root) {

           fun bind(results: Results){

               rawMoviesItemLayoutBinding.apply {
                   Glide.with(root.context)
                       .load(results.image)
                       .placeholder(R.drawable.placeholder)
                       .into(imageOfMovies)

                   titleOfMovie.text = results.title
                   descriptionOfMovie.text = results.description
               }

           }

   }

   private val diffCallback = object : DiffUtil.ItemCallback<Results>()
   {
       override fun areItemsTheSame(oldItem: Results, newItem: Results): Boolean {
           return oldItem.id == newItem.id
       }

       override fun areContentsTheSame(oldItem: Results, newItem: Results): Boolean {
           return oldItem == newItem
       }
   }

   private val differ = AsyncListDiffer(this, diffCallback)

   var result : List<Results>
   get() = differ.currentList
   set(value){
       differ.submitList(value)
   }

   override fun onCreateViewHolder(parent: ViewGroup, viewType: Int): MoviesViewHolder {
       return MoviesViewHolder(RawMoviesItemLayoutBinding.inflate(LayoutInflater.from(parent.context),
           parent,
           false))
   }

   override fun onBindViewHolder(holder: MoviesViewHolder, position: Int) {
       holder.bind(result[position])
   }

   override fun getItemCount() = result.size

}
First we will extend the reyclerview class and adapter. Then after creating one inner class called ViewHolder class.
We are using the dataBinding that’s why we put that one Binding variable. So we can access the view’s id easily. In the inner class we create one function class called bind(). In this apply all data and initialize with the view.
Succeeding the bind method let’s create an ItemCallback of diffUtils. This will compare the old list and new list, Then maintain the recyclerview in a good way.
Create one result variable which can contain a list of result class. For that we have to use the getter-setter method in Kotlin.
Finishing the all processes in this adapter, Import all three methods of adapter class and initialize all things like above code.
Jump to the viewmodel package and start the creating viewmodel class for the main activity.
ViewModel Class
MainViewModel.kt
package com.example.asyncAPIcalling.ui.viewmodels

import androidx.lifecycle.MutableLiveData
import androidx.lifecycle.ViewModel
import androidx.lifecycle.viewModelScope
import com.example.asyncAPIcalling.network.APIService
import com.example.asyncAPIcalling.network.model.IMDB
import com.example.asyncAPIcalling.utils.Const.Companion.API_KEY
import dagger.hilt.android.lifecycle.HiltViewModel
import Kotlinx.Coroutines.*
import javax.inject.Inject

@HiltViewModel
class MainViewModel @Inject constructor(private val retrofitInstance: APIService) : ViewModel() {

   val responseContainer = MutableLiveData<IMDB>()
   val errorMessage = MutableLiveData<String>()
   val isShowProgress = MutableLiveData<Boolean>()
   val expressionToSearch = MutableLiveData("")

   var job: Job? = null
   val exceptionHandler = CoroutineExceptionHandler { _, throwable ->
       onError("Exception handled : ${throwable.localizedMessage}")
   }

   fun getMoviesFromAPI(expression : String) {
       isShowProgress.value = true
       job = viewModelScope.launch {
           val response = retrofitInstance.imdbFunction(API_KEY, expression)
           withContext(Dispatchers.Main) {
               if (response.isSuccessful) {
                   responseContainer.postValue(response.body())
                   isShowProgress.value = false
               } else {
                   onError("Error : ${response.message()}")
               }
           }
       }


   }

   private fun onError(message: String) {
       errorMessage.value = message
       isShowProgress.value = false
   }

   override fun onCleared() {
       super.onCleared()
       job?.cancel()
   }

}
In this class we have to use the annotation of hilt called as @HiltViewModel. By help of this annotation we are able to notify the hilt that this is the view model class. Declare the variables which are observable to the main class. And then create one function for API calling, it is called getMoviesFromAPI(), it has one parameter to give the expression for search. In this use job variable cause job will help to create cancelable Coroutine. Start viewmodel scope and in this initialize one variable to call the interface class’s API function. For that we have to inject one variable instance of retrofit into a constructor of the viewmodel class by help of @Inject annotation. In this put the API key to that API function and that API key will create in the cons class of Util package.
Util class of constants
Const.kt
package com.example.asyncAPIcalling.utils

class Const  {

   companion object{
       const val API_KEY = "kindly_put_your_API_key_here"
   }

}
Come back to the viewmodel class, And simply put this API_KEY variable in that parameters of function. Make one condition that if the response is successful then put all data to the mutable live variable which can be observable by the main activity. And set the isShowProgress false. This condition will false then put the message to the onError() function.
The onError function simply works to put the message of the server to the errorMessage mutable live data.
Then after override the onCleared() method and candle the created job. If we can not use the job then it will be ok cause it will use the viewmodelscope so when the viewmodel is destroyed it will be automatically canceled by itself. But for knowledge purposes we can use this job’s variable. Also for the knowledge purpose you can see here that one exceptional handling variable is used to help with the Coroutine. It will throw an exception.
Quickly set all the values to the main activity.
Main class
MainActivity.kt
package com.example.asyncAPIcalling.ui.activities

import androidx.appcompat.app.AppCompatActivity
import android.os.Bundle
import android.view.View
import android.widget.Toast
import androidx.lifecycle.Observer
import androidx.lifecycle.ViewModelProvider
import androidx.recyclerview.widget.LinearLayoutManager
import com.example.asyncAPIcalling.databinding.ActivityMainBinding
import com.example.asyncAPIcalling.network.model.Results
import com.example.asyncAPIcalling.ui.adapters.MoviesRecyclerAdapter
import com.example.asyncAPIcalling.ui.viewmodels.MainViewModel
import dagger.hilt.android.AndroidEntryPoint

@AndroidEntryPoint
class MainActivity : AppCompatActivity() {

   private lateinit var activityMainBinding: ActivityMainBinding
   private lateinit var moviesAdapter : MoviesRecyclerAdapter
   private lateinit var mainViewModel: MainViewModel

   override fun onCreate(savedInstanceState: Bundle?) {
       super.onCreate(savedInstanceState)
       activityMainBinding = ActivityMainBinding.inflate(layoutInflater)
       setContentView(activityMainBinding.root)

       setUpViewModel()

       setUpRecyclerView()

       mainViewModel.responseContainer.observe(this, Observer {
           if (it != null){

               moviesAdapter.result = it.results
               activityMainBinding.validationTextForSearch.visibility = View.GONE

           }else{
               Toast.makeText(this, "There is some error!", Toast.LENGTH_SHORT).show()
           }
       })

       mainViewModel.isShowProgress.observe(this, Observer {
           if (it){
               activityMainBinding.mainProgressBar.visibility = View.VISIBLE
               activityMainBinding.validationTextForSearch.visibility = View.GONE
           }
           else{
               activityMainBinding.mainProgressBar.visibility = View.GONE
               activityMainBinding.validationTextForSearch.visibility = View.GONE
           }
       })


       mainViewModel.errorMessage.observe(this, Observer {
           Toast.makeText(this, it, Toast.LENGTH_SHORT).show()
       })

       activityMainBinding.theSearchButton.setOnClickListener { it->
           if(activityMainBinding.theSearchBar.text.isEmpty()){
               Toast.makeText(this, "Please Enter movie type", Toast.LENGTH_SHORT).show()
           }
           else{
               val searchText = activityMainBinding.theSearchBar.text

               mainViewModel.getMoviesFromAPI(searchText.toString())

           }

       }

   }

   private fun setUpRecyclerView() = activityMainBinding.movieRecyclerView.apply {
       moviesAdapter = MoviesRecyclerAdapter()
       adapter = moviesAdapter
       layoutManager = LinearLayoutManager(this@MainActivity)
   }

   private fun setUpViewModel(){
       mainViewModel = ViewModelProvider(this)[MainViewModel::class.java]
   }

}
Use the annotation for hilt notify, @AndoridEntryPoint which gives the idea about main activity to the dagger-hilt.
First we have to declare the binding variable of the xml file of the main activity. Then after declaring the adapter and viewmodel.
Set that binding variable to use and access the view’s id. Then simply create two functions for set-up the recycler view and viewmodel.
Simply observe the mutable live variable and attach it with the adapter and views of the main activity. By the help of the viewmodel instance.
In conclusion, we can say that at present time, Kotlin is becoming one of the most popular programming languages for android application development and therefore every developer should learn it.