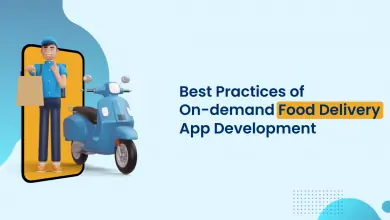
5 Interesting Ways of Using Beacon Technology in Restaurants
According to Global View Research, The global online food delivery market size was valued at USD 221.65 billion in 2022 and is expected to expand at a compound annual growth rate (CAGR) of 10.3% from 2023 to 2030. We are living in the world, where people are busy with their daily routine life and would prefer to order food online and rather than cooking.
Every year Hundreds of startups are launching in the market in the Restaurant industry and they are a neck to neck competition to get the maximum number of customers coming to their business. Online marketing, Social media marketing, is been tried by everyone more often now and attracting customers to them. To stand out from all of these, one needs to find the way and perform something unique which has not been tried by anyone else. Latest Beacon technology Proximity Marketing is one of the best effective ways of offline marketing method to be used here.
What is Beacon Technology and How it Can be Used by Restaurants?
Beacon is the Bluetooth technology which transmits the data to the Bluetooth enabled smartphones. These messages can include Text, media, links, etc. Sending an advertisement when the user is in the range of the beacon is called Proximity Marketing.
Using a beacon technology is the best and cheapest way of marketing about your business in comparison to a traditional way of doing it with Sign boards, Radios, television, etc. There are multiple businesses around the globe who is already using Proximity marketing and promoting their businesses. Here are 5 effective way of promoting your restaurant business using beacon technology:
1. Get your customers to Sign up to your When they are around.
People do check their mall frequently in a day either they are in the Mall, at the traffic signal, at railways station or bus station. Below are the best ways of marketing your business through proximity marketing:
1. Put up your beacons at Railway stations, Traffic signals, Parks, Theaters, Shopping mall to announce about your service to sign up with. Share delicious food pictures with your broadcasting message to attract more customers.
2. Place beacon at your restaurant and send the notification about the home delivery service.
3. The theater is the perfect location to place your beacon and broadcast your food delivery service, so soon after the movie, they can place the order and have the taste of your service.
2. Boost your restaurant sales by broadcasting relevant information.
Target nearby audience with the appropriate campaign.
1. If you are putting your beacon near to Gym then broadcast about health food, if it’s going to rain today broadcast a message to book a cab service.
2. Put up your beacon near the office buildings. If employees working at night, broadcast your food delivery campaign to them.
3. Tie Beacon to your Keychain and keep broadcasting your message.
Connect your beacon with your keys and carry with them the whole day. From wherever you pass by you can keep broadcasting your campaign to everyone around in the area. It’s the best of reaching out to the maximum number of people with your campaigns.
Apart from the promotional campaigns, we can send feedback forms as well to the customer to get their feedback. Connect your pocket beacons to the delivery vehicles and get some actions from parking spots and traffic signals.
4. Keep your customers engaged with your App by using Beacon technology.
Always try to gain as many as a new customer. They are more valuable than the product of the cost they purchased for and it’s always great to have the old customer retained. Even if the customer turns off the push notification, you can still connect to your customers by giving proximity beacon notifications.
1. Get insights into your customer’s taste and choices based on their browsing style and order history. You can use beacons to send them a customized menu based on their previous choices.
2. Announce your loyalty program to your nearby customers.
5. Reach out to your customers through social media accounts.
Link your Facebook ID with Latest Beacon and target your customers with cookies stored on their devices. Use those cookies and reach out to the maximum number of users with targeted advertising to your customers.
Social media is the best way of approaching the maximum number of people. With this, you can understand the taste, choice of food and preferences of the user.
Try out Latest Beacon technology to promote your food delivery or any other business, which includes everything you need to start with. Using Latest Beacon technology, you can set up your own campaign.
Wrapping Up
Beacon technology has the potential to revolutionize the customer experience in restaurants by increasing the utility and engagement of their mobile services. Restaurants can provide different deals and special offers through Beacons when they are nearby. Moreover, marketing and advertising play an important role in the management of restaurants. It is very effective to attract new customers through personalized promotions at different times and different places.